











Single sign-on with Microsoft ADFS
Zefi supports Single Sign-On (SSO), allowing you to manage your team’s access through your identity provider (IdP). This means your team can access Zefi without needing separate passwords. When SSO is configured, users (team members) are automatically redirected to your IdP for authentication when they sign in to Zefi.
Your IdP checks that each user is allowed to access Zefi and sends Zefi a signed SAML assertion that confirms their identity. When your account requires SSO, manage your team's access in your IdP.
1. Create the relying party trust in ADFS
- Open ADFS Management with administrator rights.
- Go to Relying Party Trusts and click Add Relying Party Trust.
- Choose Claims aware, then click Start.
- On Select Data Source, choose Enter data about the relying party manually, then enter a display name (for example Zefi).
- On Configure Certificate, skip the step: Zefi does not use encrypted assertions.
- Fill in the remaining settings:
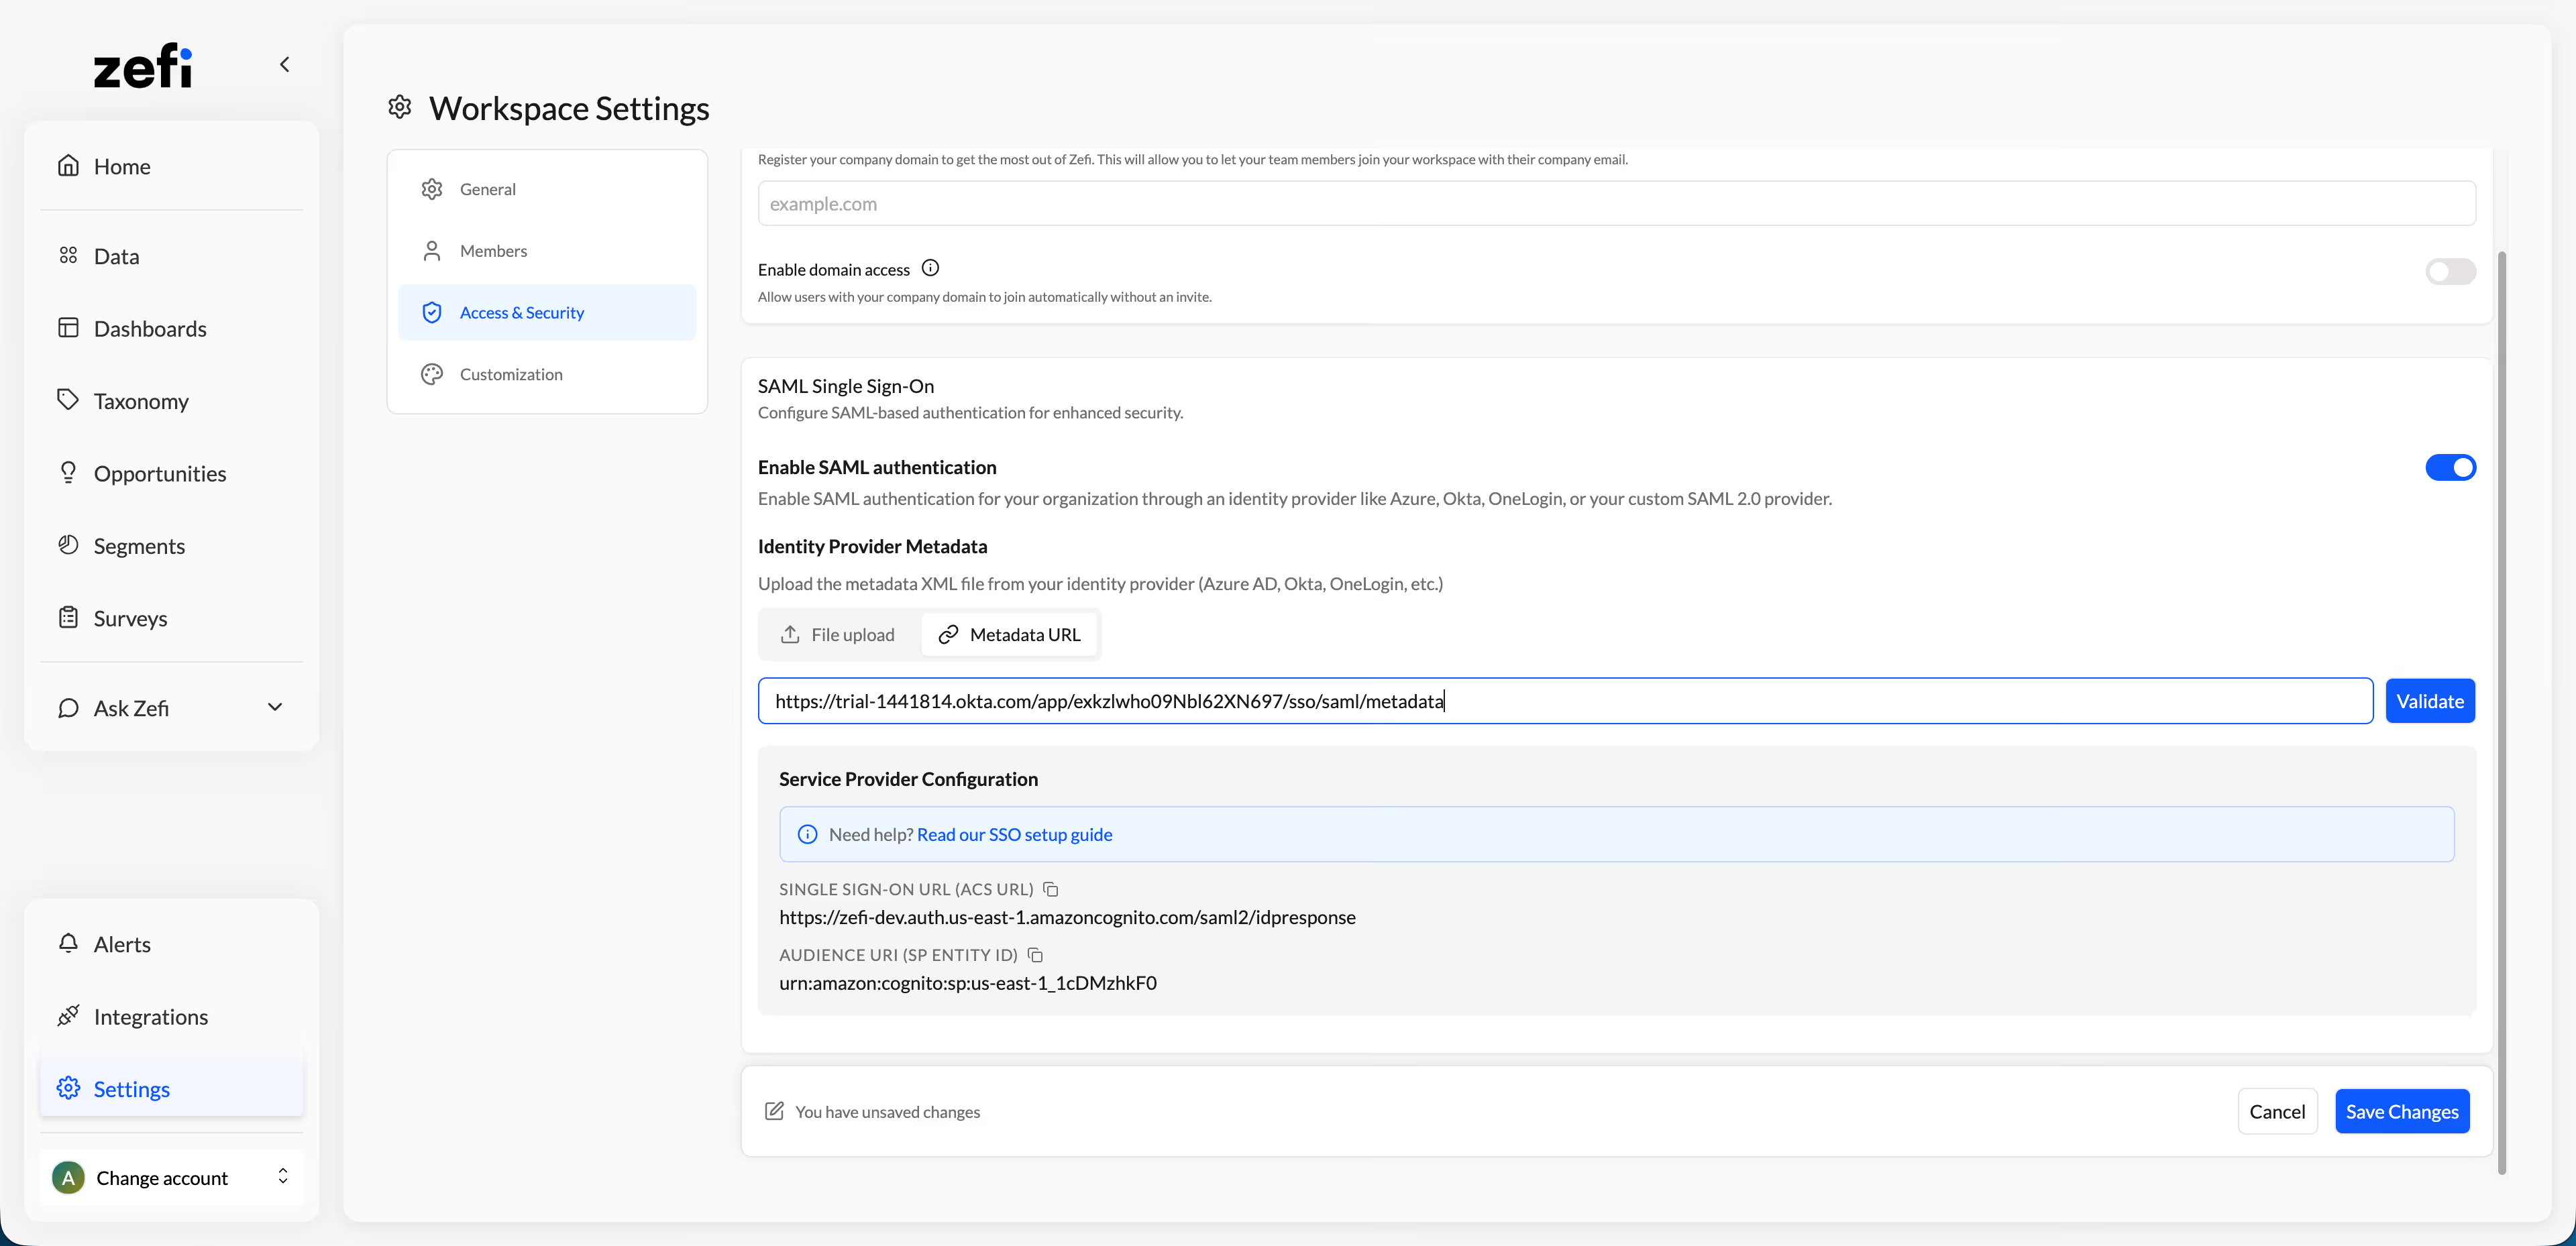
- Configure URL: tick Enable support for the SAML 2.0 WebSSO protocol and paste the Single sign-on URL (ACS URL) shown in the Zefi platform.
- Configure Identifiers: add the Audience URI (SP Entity ID) shown in the Zefi platform, exactly as it appears.
- Choose Access Control Policy: Permit specific group (for example a Zefi users group) or Permit everyone.
- Finish, with Configure claims issuance policy for this application ticked.
- Set up sign-out: ask your Zefi contact for the Zefi signing certificate, then open the trust's Properties and add the certificate on the Signature tab.
- On the Endpoints tab, add a SAML Logout endpoint with binding POST and trusted URL https://eu.auth.zefi.ai/saml2/logout (the Single sign-on URL with idpresponse replaced by logout). Without it, sign-in works but signing out shows an ADFS error page.
2. Add the claim rules
- Zefi reads three attributes with these exact, case-sensitive names: email, firstName and lastName. ADFS sends long URI names by default, which Zefi does not read, so type the names by hand instead of picking them from the list.
- Open Edit Claim Issuance Policy on the Zefi trust and click Add Rule.
- Rule 1: choose Send LDAP Attributes as Claims, attribute store Active Directory, and add these rows (LDAP attribute -> outgoing claim type):
- E-Mail-Addresses -> email (type it), plus a second row E-Mail-Addresses -> E-Mail Address (pick it from the list; rule 2 uses it)
- Given-Name -> firstName (type it)
- Surname -> lastName (type it)
- Rule 2: choose Transform an Incoming Claim, with incoming claim type E-Mail Address, outgoing claim type Name ID and name ID format Email. Without it, ADFS sends no Name ID and Zefi rejects the sign-in. Users with no email address (mail attribute) in Active Directory can't sign in.
3. Connect ADFS to Zefi
Export the metadata from ADFS
- Download the federation metadata file from https://<your-adfs-host>/FederationMetadata/2007-06/FederationMetadata.xml and save it as an .xml file.
- You can give Zefi that URL instead only if it is reachable from the public internet. Most ADFS servers are internal, so uploading the file is usually the way.
- ADFS renews its token-signing certificate automatically, usually once a year. Each time it changes, upload the new metadata file in Zefi, or sign-ins will stop working.
Configure your Zefi account to connect with ADFS
- In the Zefi platform, go to Settings -> Security -> SAML Single Sign-On and turn on Enable SAML authentication.
- Under Identity Provider Metadata, choose File upload, select the metadata file and save.
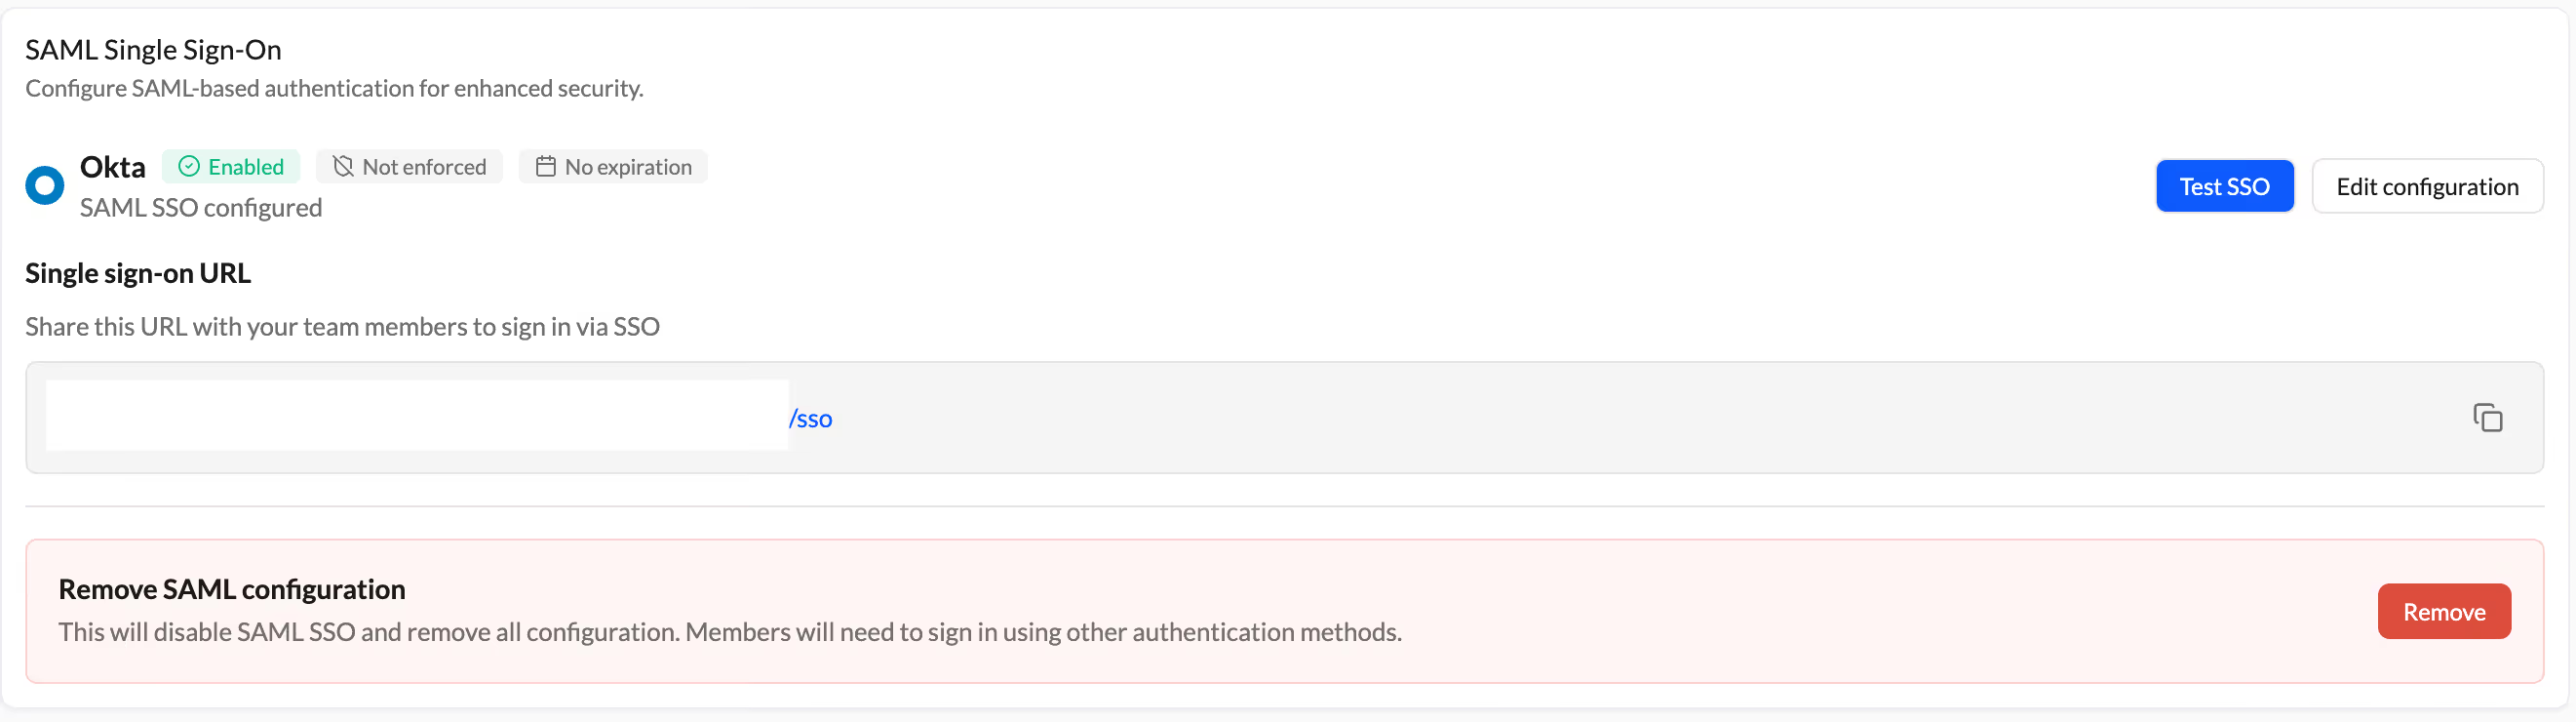
- Ask your Zefi contact to link your company email domain, so that typing a work email on the Zefi login page takes users to ADFS. Until then, users sign in with the Start URL shown in Settings -> Security.
- Test: in a private browser window, open the Start URL, sign in on the ADFS page and check that you land in Zefi. Then sign out and check that you are back on the Zefi login page.
- Sign-in must start from Zefi (the login page or the Start URL). Starting from the ADFS sign-in portal is not supported.
Supported features

Configure Zefi accounts to either mandate SSO for all users or allow sign-in using SSO or email and password.
Automatically create new Zefi accounts for users without existing access upon their first SSO sign-in.
Limitations

Zefi isn't notified when you revoke a user's access in your IdP. The user loses access the next time they try to sign in through SSO. To remove access immediately, delete the user from your team settings in Zefi.





Zefi has received an investment financed with resources from Italy’s National Recovery and Resilience Plan (PNRR – Mission 4, Component 2, Investment 3.2 “Funding of start-ups”) through the Digital Transition Fund, managed by CDP Venture Capital SGR. The investment supports Zefi’s innovation in the digitalisation of companies, helping businesses adopt AI to understand and act on customer feedback.